Why should I make a Gauge Square
Before you start your next knitting or crochet project, there’s one small step that can save you time, frustration — and even wasted wool. It’s called a gauge square, and it’s the secret to making sure your finished item looks (and fits!) exactly as the pattern intended.
Whether you’re knitting a jumper, a hat, or a pair of socks, taking just 30 minutes to check your tension can make all the difference.
What is Gauge and Why Does it Matter?
Everyone knits and crochets a little differently. Some people naturally knit with a tight stitch, while others knit more loosely. This affects the number of stitches and rows you create in every 10 cm (4 inches) — which is what we call your gauge or tension.
Patterns are written with an assumed standard tension in mind. If your tension is tighter or looser than the pattern’s, your finished project could turn out:
- Too big or too small
- The wrong shape
- Uncomfortable to wear or use
That’s why it’s important to knit a small test square first — using the same yarn, needles, and stitch pattern as your project — and measure your gauge.
How do I know what the right gauge should be
Look at:
- The yarn label – most yarns include a recommended gauge and needle size.
- Your pattern instructions – they’ll usually state something like:
“20 stitches and 28 rows = 10 cm in stocking stitch using 4mm needles.”
🎯 This is your target gauge.
How do I know if my tension is correct
Make a small test swatch (also known as a gauge square) before you begin your project.
- If your stitches are too loose, your square will be too big → Go down a needle/hook size.
- If your stitches are too tight, your square will be too small → Go up a needle/hook size.
It might feel like an extra step, but it’s one that will save you hours later — especially with larger items like jumpers and blankets.
What is a gauge square (often called a "gauge swatch" too)
It's a swatch that you knit up in the same stitch as the pattern with the same yarn, the same needles, and the same stitch pattern that you’ll use for your actual project. By doing this you will see with a tighter or looser tension to that recommended for the pattern.
How to make a gauge swatch
To get an accurate tension reading:
1. Use the same:
- Yarn as your project
- Needle or hook size
- Stitch pattern (usually stocking stitch)
2. Cast on more stitches than the pattern gauge.
If your pattern gauge says 20 stitches = 10 cm, cast on around 30 stitches to give you margin on each side.
3. Knit around 4–5 cm more than the required height.
If the gauge is 28 rows, knit about 40–45 rows.
Block the swatch (if your final project will be blocked) and let it dry. 👀We've got a separate blog on blocking here.
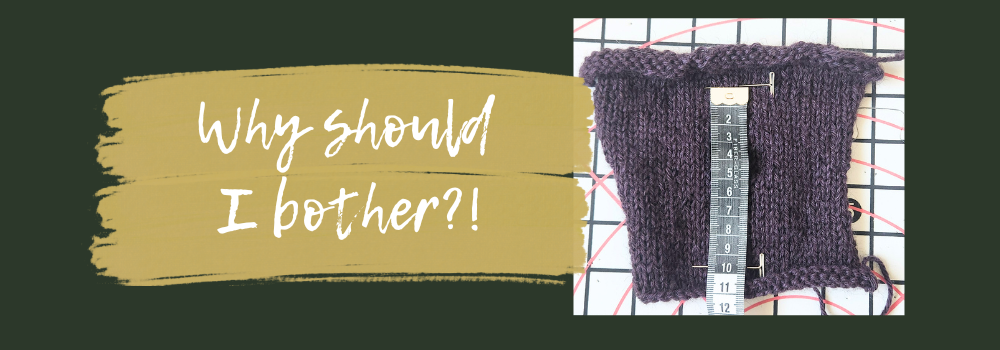
How to measure your Gauge
Measure 10 cm (4 inches) vertically and horizontally and pin the start and the finish.
1. Stitch Width

- Lay your gauge square flat.
- Count how many full stitches fit into 10 cm (4 inches).
2. Row Height

- Count how many rows fit into 10 cm.
What happens if you skip this stage?
Imagine your pattern says to knit 20 stitches over 10 cm, but your tension only fits 18 stitches. On a jumper that’s 10 panels wide, your finished piece could end up than intended — enough to ruin the fit.
A little square now = a perfect project later!
How can I fix it?
- Your tension matches: Start knitting !
- You have too many stitches: if you are a tight knitter, try going up a size in needles.
- You have too few stitches: if you are a loose knitter, try going down a size in needles.
Final Tips
- Always measure in the middle of your square — the edges can distort your tension.
- Don’t pull or stretch the square as you measure.
- Wash and block your swatch if your finished item will be treated the same way.
In Summary
Knitting or crocheting a gauge square might feel like a chore, but it’s actually the best investment of your time. It helps you:
- Get a perfect fit
- Avoid frustration
- Save yarn and effort
- Enjoy the process more!